I’m taking an Intermediate Fabrication class at Jewel Envy. In the last class we learned how to make a die form to create hollow-form shapes. After 3 hours of intense, focused work, I brought my work home to show my husband.
“Want to see what it took me all goddam class to make?” I asked as I walked through the door. THIS:


“That’s…it?” said Dave. (Now don’t get me wrong, Dave is amazingly supportive and encouraging husband, but both of us are pretty pragmatic and cynical, so we were both on the same page on this.)
Yep, that’s it. It’s a lame little triangle of copper, with one side slightly puffed out or domed and the other flat, and it’s hollow inside. Dave said, “I’m sorry, but I wouldn’t pay 10 cents for this.” Which is Dave’s slightly nicer way of paraphrasing Justin Halpern’s father (of Shit My Dad Says fame) when he said “Listen, I don’t want to stifle your creativity, but that thing you built there, it looks a pile of shit.”
Fair enough! Agreed. I don’t think I can even tart this thing up into a reasonable pendant for a necklace or something — which was the original intent…here’s my sketch; the drawing at the bottom right is what I had in mind:

Nonetheless, here’s what this ‘pile of shit’ copper puffy triangle actually represents…
I learned how to make a die form. This involved sawing a rounded triangular shape out of a sheet of brass then gluing the brass to a wooden block and, using a drill press, then a saw and files, creating a hole in the block the same shape as the triangle.


Having made the die form, I can now make as many puffy little triangles as I want! So if I wanted a whole necklace, say, with a matching pair of earrings, of little puffy triangles, I could do that. I could also create the triangles in other materials such as silver.
To use the die form, I placed a sheet of copper on top and put it into a hydraulic press. The extreme pressure in the press causes the copper to get pressed down into the hollow triangle of the dye form. The higher the pressure, the puffier the triangle, but you have to be careful not to put too much pressure or it can blow a hole through the copper. Then I cut the puffy triangle out of the copper sheet with a saw and filed the edges smooth. Next I soldered the triangle to another flat piece of copper, sealing all the edges, then cut the piece out and filed the edges smooth again.
Even though this first attempt is what Sam Halpern might call a pile of shit, it does mean I’ve learned a new technique for metalsmithing and jewelry making. And in the hands of an experienced artist like Barbara Bayne, this technique results in some gorgeous jewelry. Look at Bayne’s amazing pieces created using die forms:

Or this piece by Judith Neugebauer:

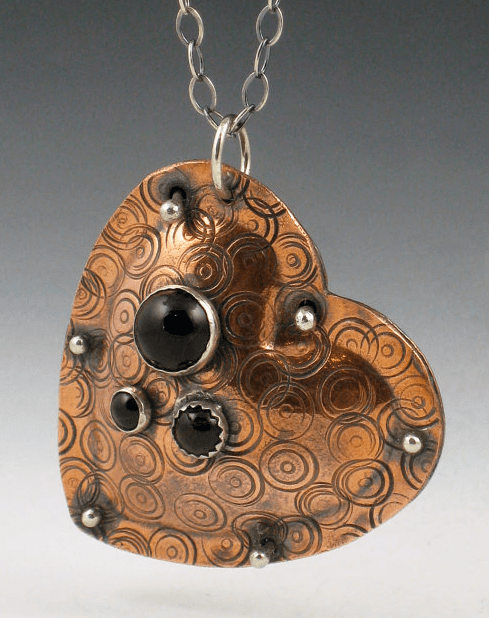
Or this cute Copper Puffed Heart Necklace from Michele Grady Designs on Etsy:
As for me, die forming definitely isn’t my favourite technique I’ve learned so far in my jewelry-making classes, but, as always when I learn a new handcrafting technique, it certainly makes me appreciate how much work goes into creating the tiniest pieces that most take for granted.

